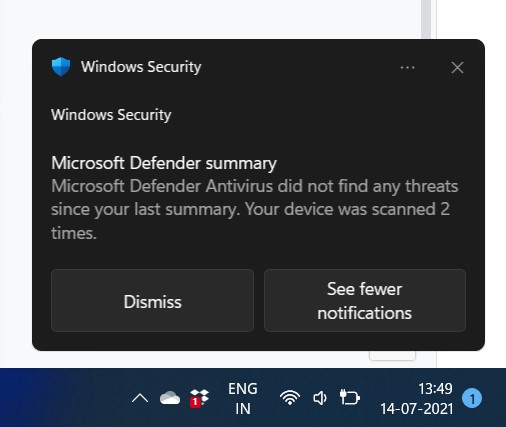
Notifications keep users updated with app and service activity on a Windows computer. However, an overflow of notifications can overwhelm. If you seek to disable notifications in Windows 11, whether for specific apps or the entire OS, you’re in the right place. Read on to learn how and reduce distractions efficiently.
Disabling Notifications in Windows 11 (2021)
This article presents sections addressing notification scenarios and their disabling methods. Let’s begin without delay.
Table Of Contents
Note: This article focuses on disabling notifications in Windows 11. If you haven’t upgraded from Windows 10 to Windows 11 or have already rolled back to Windows 10, check out our detailed guide on disabling notifications in Windows 10.
Disable Suggested Notifications
Nothing annoys me more than a machine telling me what to do. If you are reading this, the feeling is likely mutual. With Windows 11, Microsoft sends suggested notifications to promote its features. While useful for beginners, power users find this redundant and forced. If you don’t want suggested notifications, here’s how to turn them off in Windows 11:
1. To remove a suggested notification banner in Windows 11, simply click the horizontal three-dots menu and select “Turn off all notifications for Suggested”.
2. Access the notification panel by clicking on the date and time or using the Windows 11 keyboard shortcut Win key + N. Then, locate the suggested notification, and choose “Turn off all notifications for Suggested” under the three-dots menu.
3. Additionally, navigate to System -> Notifications and uncheck “Offer suggestions on how I can set up my device” and “Get tips and suggestions when I use Windows”. This ensures Windows 11 won’t bother you with suggestions.
Disable Notifications: Simplify Your Windows 11 Experience
1. Notifications in Windows 11 are now conveniently accessible through the date and time system tray icon. Simply open the Notification Center and select the three-dot menu on any notification to disable it.
2. Opt to “Turn off all notifications for” from the menu options to stop receiving notifications from specific apps. For a complete notification blackout, refer to the next section.
Turn Off All Notifications: Achieve Total Focus in Windows 11
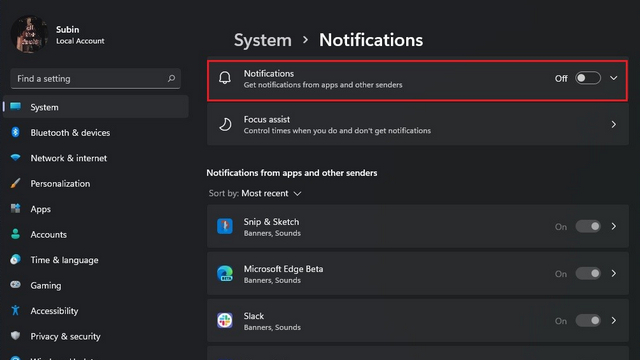
1. To eliminate all distractions, disable notifications system-wide in Windows 11. Access the Settings app, go to System -> Notifications, and switch off the “Notifications” toggle.
2. To receive notifications with minimal intrusion, adjust lock screen notifications, notification sounds, and other settings. Access these options by expanding the Notifications menu in Settings.
Disable Lock Screen Notifications
For a cleaner lock screen appearance, go to System -> Notifications and turn off the “Show notifications on the lock screen” toggle. With Microsoft’s removal of Quick Status icons on the lock screen, there’s one less feature to disable in Windows 11.
Turn Off Notifications for Individual Apps from Settings
Microsoft simplifies disabling notifications for individual apps in Windows 11. Navigate to System -> Notifications in the Settings app and locate the desired app under “Notifications from apps and other senders.”
To find the app quickly, sort them by name or most recently used apps. Once found, toggle off notifications next to the app listing. You will no longer receive notifications from it. Repeat these steps for other apps as needed.

Turn Off Notification Banners in Windows 11
1. Although there isn’t a universal toggle for disabling notification banners in Windows 11, you can individually disable the feature for specific apps. Navigate to System -> Notifications and select the target app from the “Notifications from apps and other senders” section.
2. You will find a checkbox labeled “Show notification banners“. Uncheck it, and you’re done. Alternatively, you can disable notifications in the notification center for individual apps from this screen.
Setting Notification Priority in Windows 11
1. To ensure you don’t miss important notifications from work or favorite apps, set them as priority. Click on the three-dots menu of a notification in the notification center and choose “Make high priority”.
2. Additionally, adjust app notification priorities via the Settings app. Navigate to System -> Notifications and select the desired app from the “Notifications from apps and other senders” section.
3. On the app’s notifications page, prioritize notifications as Top, High, or Normal. Prioritize essential apps as High to stay updated.
Mute Notifications using Focus Assist
In Windows 10, the Focus Assist feature, also available in Windows 11, allows you to control distracting notifications. It automatically activates during gaming, or when using a second monitor or projector to duplicate your display. However, you can manually enable it by following these steps:
1. Open the Settings app on your Windows 11 PC and select “Focus assist” under System.
2. Opt to view only alarms or notifications from priority apps when enabling Focus Assist, based on your preference.
3. If you prefer notifications from specific apps, customize your priority list by selecting “Customize priority list.”
4. Next, click “Add an app” to prioritize an app.
5. Select the desired app from the list to receive notifications exclusively when Focus Assist is enabled.
6. You can also set up automatic rules for Focus Assist, such as during work hours or gaming sessions. Customize the toggles to suit your needs.
7. To manually toggle Focus Assist, access the Action Center and click the Focus Assist toggle. For enhanced productivity, consider utilizing third-party apps like Freedom or LeechBlock, as recommended in our article on optimizing work focus.
Clearing All Notifications in Windows 11
One final tip before concluding: dismiss notifications quickly with a click. Windows 11 introduces a convenient “Clear all” button to help users bulk dismiss unnecessary notifications.
To do this, open the notification center by clicking on the date and time UI or using the new keyboard shortcut Windows + N. You’ll find a new “Clear all” button at the top right. Click to dismiss all notifications in Windows 11.
Disable Distracting Notifications on Windows 11
If you’re a Windows user, you might have noticed that disabling notifications in Windows 11 hasn’t changed much from Windows 10. Nonetheless, we hope this article aids users new to Windows 11 or those transitioning from Mac. If you found this guide helpful, explore our articles on taking screenshots and checking screen time in Windows 11.

Pritam Chopra is a seasoned IT professional and a passionate blogger hailing from the dynamic realm of technology. With an insatiable curiosity for all things tech-related, Pritam has dedicated himself to exploring and unraveling the intricacies of the digital world.


