
Just as iMessage is my go-to messaging app, the Health app reigns supreme for tracking and managing health data. Amidst the plethora of health and fitness apps flooding the App Store, none can rival the comprehensive health tracking capabilities of Apple’s offering. While the app has become feature-rich, catering to fitness enthusiasts, it has also steepened the learning curve, particularly for beginners. To navigate this curve seamlessly and achieve your fitness goals without hindrance, explore these 17 expert tips for using the Health app on your iPhone.
Pro Tips for Health App Mastery on iPhone
Besides optimizing major Health features, this guide also offers insights into managing your health data efficiently. Learn to control apps’ access, monitor data usage, revoke access, and delete specific or entire records for privacy or storage management.
Additionally, discover clever hacks to safeguard your health data from prying eyes. While convenient for many, certain features may pose privacy concerns. Therefore, it’s essential to maintain control over these potentially dual-purpose tools. Let’s delve into the top tips for maximizing the iPhone Health app!
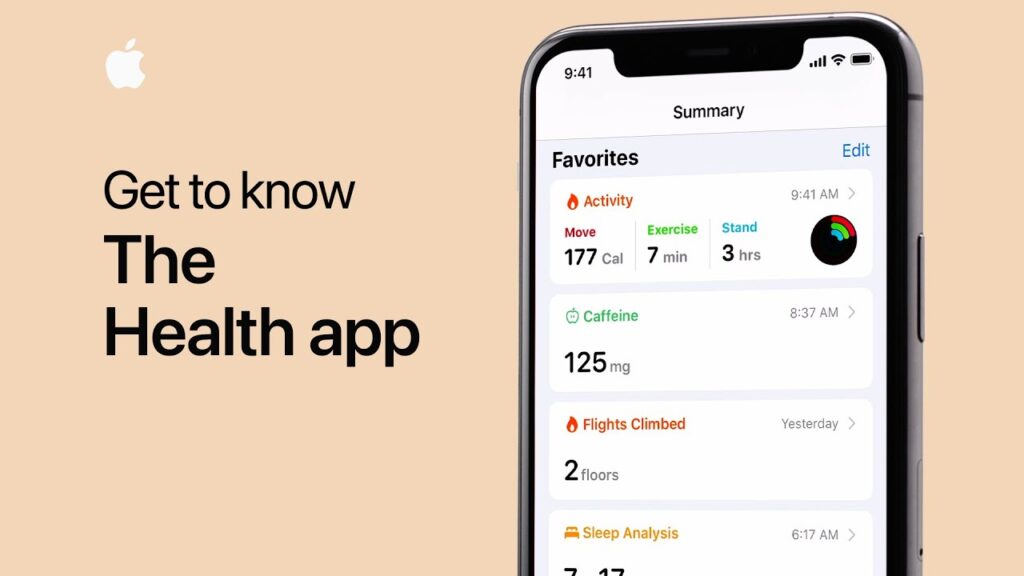
1. Personalize Your Favorites
A feature-rich app like Health requires smart management to avoid clutter and ensure convenient tracking of health and fitness data.
The Health app allows you to prioritize items for monitoring, enabling you to focus solely on what matters. To do this, navigate to the Summary tab within the app on your iPhone, then proceed to the Edit section under the All tab. From there, simply tap the star icon next to each item you wish to display on the Summary screen.
After customizing your favorites, be sure to select Done in the top-right corner to save your changes.
2. Setting Up and Utilizing Sleep Tracking
Undoubtedly, iOS 14 (and watchOS 7) highlighted Sleep Tracking, a key health feature of the Apple Watch. Given the importance of quality sleep, it had long been on my radar. While many third-party sleep tracking apps exist for iPhone, I desired a built-in tracker, a sentiment shared by many health enthusiasts.
Activating sleep tracking in the Health app for iOS is straightforward. Navigate to Health app -> Browse tab -> Sleep and follow simple instructions to set it up on your iPhone and enable detection on Apple Watch.
3. Manage Sleep Tracking Data Sources
Depending on your needs, manage sleep tracking data sources in the Health app on your iPhone. Stop any source from using sleep tracking data and track all accessed data. It’s about having complete control over your sleep tracking data and allowing/disallowing apps’/associated devices’ access at your will.
Open Health app on your iPhone -> Browse tab -> Sleep -> Data Sources & Access (bottom). Under Apps Allowed to Read Data, see allowed apps. Use toggle next to each app to allow/disable its access to sleep data.
Under the Data Sources section, you’ll find a list of apps authorized to update your data. Tap each app to view its accessed data. Additionally, you can delete specific or all sleep data collected by a source.
4. Delete Entire Sleep Tracking Data
You might no longer want to use native sleep tracking or wish to clear sleep tracking data from the Health app for space reasons. Whatever your motive, you can delete all sleep tracking data to safeguard privacy or declutter the Health app.
To accomplish this, navigate to the Health app on your iPhone, then proceed to the Browse tab, followed by Sleep, and finally select Show All Data located at the bottom. On this screen, all recorded sleep tracking data will be displayed. Next, tap Edit in the top right corner and choose to delete specific data or remove all data at once. Don’t forget to tap Done to confirm the action.
5. Cycle Tracking Setup and Usage
Cycle Tracking is a significant feature for women’s health, designed to track menstruation cycles and fertility windows. Utilize it to monitor daily symptoms and monthly activity via the Health app or the standalone Cycle Tracking app on Apple Watch. Additionally, it provides predictions for period and fertility windows, aiding in synchronization and planning.
To begin, visit the Health app on your iPhone, then navigate to the Browse tab -> Cycle Tracking -> Options. Next, select Period Length and input your period duration. Afterward, select Cycle Length and input the interval between periods to set up Cycle Tracking on your iPhone and Apple Watch.
Once Cycle Tracking is activated, customize it to suit your preferences. For example, you can opt to include or exclude cycle log options and display logged sexual activity and basal body temperature.
6. Monitor Headphone Audio Levels in Real-Time
Introduced in iOS 13, Hearing helps prevent overexposure to loud sounds. iOS 14 builds upon this feature by enabling real-time monitoring of headphone audio levels on your iPhone.
For the uninitiated, 85 decibels is the highest safe exposure level for up to 8 hours, while 100 dB is considered safe for just 15 minutes daily. Safe listening time decreases as sound level increases, so track headphone audio levels to protect hearing.
Only Apple-certified headsets and AirPods deliver accurate results. To begin, navigate to the Settings app -> Control Center. Then, locate Hearing and tap the “+” button beside it.
Image credit: Apple
Going forward, track headphone audio levels from the Control Center. A green tick indicates acceptable volume, while a yellow exclamation mark signifies levels exceeding 80 decibels, harmful to ears.
The Health app provides detailed insight into headphone audio levels. Access it through Health app -> Browse tab -> Hearing. Review past 7 days’ headphone audio and environmental sound levels.
7. Set Up Cardio Fitness Levels
The newly-launched cardio fitness feature (introduced in watchOS 7.2 and iOS 14.3) allows you to track your cardio fitness through VO2 max measurements. VO2 max is the maximum oxygen the body can use during exercise, which you can increase through physical activity.
Before watchOS 7.2, Apple Watch estimated higher VO2 max levels with outdoor runs, hikes, or walks. Now, with cardio fitness levels, the smartwatch measures cardio fitness as High, Above Average, Below Average, or Low throughout the day.
To begin, navigate to Health app -> Browse tab -> Heart -> Cardio Fitness -> Set Up. Then, follow the provided instructions to complete the setup process.

8. Add Emergency Contacts
Emergency SOS is an indispensable feature, ensuring prompt assistance in critical situations. Once activated, it not only contacts emergency services but also notifies your chosen contacts for swift response. Apple facilitates effortless addition and removal of emergency contacts on your iPhone.
To add emergency contacts, access Health app -> your profile -> Medical ID -> Edit -> add emergency contact. Select the contact and specify the relationship, then tap Done at the top corner to confirm.
9. Hide Medical ID from the Lock Screen
There’s a valid reason Apple allows Medical ID access from the lock screen. In emergencies, it’s crucial for others to reach your emergency contacts swiftly. But what if you want to keep your information private? No problem. You can hide Medical ID from the lock screen. Open Settings -> Health -> Medical ID -> Edit. Turn off Show When Locked toggle. Tap Done to finish.
10. Bedtime Alerts: On or Off?
The bedtime alert reminds you to sleep at your chosen time to achieve your sleep goal. While helpful, it can become bothersome when no longer needed or once accustomed to the routine. Fortunately, you can disable bedtime reminders on your iPhone.
In iOS 14 or later, Apple has adjusted the process for toggling bedtime reminders. The bedtime tab is now absent from the Clock app, and the sleep reminders toggle is found within the Health app. Though the new process may seem confusing, understanding it is key to managing bedtime alerts.
To access Health, go to the Health app -> Browse -> Sleep -> Options (located at the bottom). Adjust the Sleep Reminders toggle as needed.
11. Manage Siri Suggestions from Health on Your iPhone Home Screen
Siri suggests based on your Health app usage, appearing on the home screen, in search, and lookup. While helpful, some may prefer to hide these suggestions.
To do so, navigate to Settings -> Health -> Siri & Search on your iPhone. Under On Home Screen, disable toggles for Suggest App, Show App in Search, Show Content in Search, and Show Suggestions from App. Then, exit Settings.
12. Hide Siri Suggestions from Health on Your iPhone Lock Screen
Many privacy-conscious iPhone users seek to hide Siri Health suggestions from the lock screen. While I appreciate Siri’s personalized suggestions from Health on the home screen, I prefer to keep them off the lock screen.
To do this, go to the Settings app on your iPhone -> Health -> Siri & Search. Then, under Lock Screen, disable the switch next to Show Suggestions from App.
13. Manage Your Health Checklist
The Health app offers a comprehensive health checklist to monitor enabled features on your iPhone and recommends activating those to enhance fitness. To view your health checklist, navigate to Health app -> your profile -> Health Checklist.
This screen displays active health features, while the Inactive section lists those to enable. Convenient, isn’t it?
14. Control Apps’ Access to Your Health Data
In typical Apple fashion, the Health app grants you control over apps’ access—both first and third-party—to your health data. You can track which health data each app has accessed and delete recorded data at your discretion, optimizing your personalized health and fitness tracking.
To manage app access: Launch the Health app on your iPhone -> Profile -> Apps. Review the list of apps with access to your Health data. You can delete recorded data for any app if necessary.
15. Back Up Your Health Data in iCloud
iCloud backup automatically includes essential data like your health, eliminating worry over potential loss. Enable iCloud backup by toggling the option next to Health in your iPhone’s Settings app (Settings -> Profile -> iCloud -> Health).
Given iCloud’s 5GB free storage limit, some users opt to exclude Health app data from cloud storage to better manage space. If this applies to you, simply disable the Health toggle.
16. Incorporate Health Data into iTunes/Finder Backup
iCloud backup excludes your Health data by default, unlike iTunes/Finder backup. To safeguard your progress, encrypt your iPhone backup to include this crucial information along with Wi-Fi settings and call history while preventing unauthorized access.
To begin, connect your iPhone to your computer, then open iTunes or Finder (for macOS Catalina or later) and select your device. Enable Encrypt local backup, set a password, and click Set Password. Finally, initiate the backup process by selecting Back Up Now.
17. Exporting Health Data
Health enables straightforward export of your entire health data. If you ever wish to export it to other health and fitness apps or store it for keepsake, you can do so easily.
Keep in mind, exporting Health data from iPhone results in a zip archive containing raw data in XML format. This includes information from the Health app and associated devices, such as Medical ID data, distance tracking, iPhone step count, data from paired Apple Watch, and third-party devices like smart scales or blood pressure monitors.
To export your health data: Open the Health app on your iPhone, navigate to your profile, and select “Export All Health Data.” Follow the instructions provided.
Maximizing Your Health App Experience on iPhone
There you have it! You’ve unlocked the Health app’s full potential on your iPhone. With a solid grasp of its key health and fitness features, leverage these tips to enhance your wellness journey. Remember, it’s never too late to begin anew. And, feel free to share any additional Health app features in the comments below!

Pritam Chopra is a seasoned IT professional and a passionate blogger hailing from the dynamic realm of technology. With an insatiable curiosity for all things tech-related, Pritam has dedicated himself to exploring and unraveling the intricacies of the digital world.