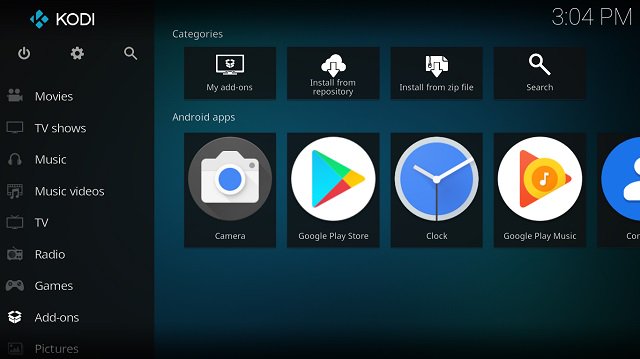

Kodi, a highly favored media server application, boasts widespread popularity among users, owing to its compatibility with nearly all major operating systems. Recent advancements in Chrome OS now permit the installation of the Kodi app directly from the Google Play Store on newer Chromebooks. Nevertheless, it’s worth noting that Play Store support, synonymous with Android app compatibility, remains limited, particularly for older Chromebook models. If you find yourself among the Chromebook users excluded from this functionality, fret not. This article presents straightforward methods for installing Kodi on your Chromebook, regardless of Play Store support.
Installation Process
This article discusses three methods to get Kodi on Chromebook. The first method requires a Chromebook supporting Google Play Store, while the next two are for older Chromebooks lacking this support. Feel free to navigate to your preferred section.
Install Kodi on Chromebook From Google Play Store
1. Open Google Play Store on your Chromebook, search for Kodi, and install it like any other app.
2. After installation, open it and grant necessary permissions.
3. Now, add media sources and run it as on Windows or other platforms. The advantage is installing add-ons, Kodi repository, and more without limitations.
Install Kodi on Chromebook sans Google Play Store
Google Play Store absent on your Chromebook? No problem.
If Google Play Store is missing on your Chromebook, follow these steps:
1. Open Settings and tap the hamburger menu in the top-left corner.
2. Select “Google Play Store” from the menu.
3. Click the “Turn on” button to activate the Google Play Store.
Chromebook users increasingly expect Play Store support. However, for older Chromebooks lacking this feature, running Kodi remains feasible without Play Store access. Here’s how:
Note: ARC Welder, a tool for converting Android apps to Chrome OS apps, is utilized for testing purposes. Please be aware that there may be some performance issues and lag.
1. Obtain the Kodi APK file from the official website. Click “Android” and choose the appropriate Chromebook build. If uncertain, install the Cog (Free) extension to identify your Chromebook build.
2. Then, add the ARC Welder (Free) extension from the Chrome Web Store. Unlike other Chrome extensions, its file size is significant, approximately 200 MB, so please be patient during the download.
3. Following installation, open ARC Welder and select the “Choose” button.
4. Select the directory where the Kodi APK is downloaded and click “Open”.
Note: Do not choose the APK file here.
5. Click “Add your APK” on ARC Welder.
6. Choose the Kodi APK file and click “Open”. It will take time to process the APK.
7. You will be given options. Ensure “Landscape” orientation and “Tablet” form factor are selected. Then, click “Test”.
8. Kodi will launch automatically, though it may take time to load completely. Eventually, Kodi should function on your Chromebook.
Note: To use Kodi with ARC Welder, you must manually add the APK each time and test it.
Installing Kodi on Chromebook via Chrome Extension
Using Kodi with ARC Welder requires manually adding the APK each time and testing it, which is both time-consuming and inconvenient. To streamline this process, we can develop an extension that launches Kodi via ARC Welder. Users can then access Kodi directly from the app drawer, just like any other application. Below are the steps to proceed:
Note: When testing the Kodi APK file on ARC Welder, a unique folder containing all necessary files for creating an extension is generated. We will utilize this exported folder from ARC Welder to create the Kodi extension. Therefore, ensure you have completed the APK testing process outlined above before proceeding to this section.
1. Open Chrome browser, click the 3-dot menu, then select “More Tools” and “Extensions”.
2. Enable “Developer mode” from the top-right corner. A new sub-menu appears; click “Load unpacked”.
3. Locate the APK file directory and find the exported folder from ARC Welder. Select it, then click “Open”.
4. Kodi is now added to your app drawer. Use it like any other app.
Install Kodi on Chromebook for Seamless Entertainment
This is how you install Kodi on Chromebook regardless of Google Play Store support. Use the simpler method if your Chromebook natively supports Play Store to enjoy Kodi normally. If your device lacks Android app support, let ARC Welder create a virtual Android Runtime Environment to run APKs on Chromebook smoothly. If you found this Kodi guide helpful or have similar tips to share, drop a comment below.

Pritam Chopra is a seasoned IT professional and a passionate blogger hailing from the dynamic realm of technology. With an insatiable curiosity for all things tech-related, Pritam has dedicated himself to exploring and unraveling the intricacies of the digital world.