Among keyboard apps, Google’s stands out. Formerly Google Keyboard, Gboard shines as one of Android and iOS’s best. If you’ve just acquired an Android phone, especially with stock Android, chances are Gboard came pre-loaded. Beyond its speed and great features, did you know it’s packed with cool tricks? Wonder no more; here are 12:
Gboard Tips and Tricks for Android and iOS
1. Google Translate Integration in Gboard (Android)
- While using Gboard, tap the Google ‘G’ icon located at the top-left of the keyboard. This reveals various options, including the Google Translate feature.
- Select the language you wish to translate into. Once chosen, any text entered into the translation box will be automatically translated into the selected language.
2. Navigate Text Easily with Gboard (Android only)
So, you’ve written a long message only to discover a few typos scattered around. Pinpointing them precisely can be challenging for some. Luckily, Gboard has your back in this regard, offering more than one method to assist you.
Firstly, you can slide your finger across the spacebar to navigate text or slide across the delete button to remove it. The latter is more focused. To utilize this method, follow these steps:
- While using Gboard, tap the Google ‘G’ icon at the top-left of the keyboard. You’ll then see various options. Here, tap the icon resembling the letter ‘I’.
- Now you’ll see a special layout for navigation. Here, you can navigate across letters, paragraphs, and use clipboard functions like selecting, copying, and pasting.
3. Shortcuts in Gboard
Punctuation Shortcuts in Gboard
If you have to insert only one punctuation, then this shortcut is very handy. Simply long-press on the period key (‘.’) and you’ll see a list of punctuation marks pop up. You can hover over any one of them and then lift your finger to insert it.
Special Character Shortcuts in Gboard
Similar to the prior shortcut, for inserting special characters instead of punctuation marks, Gboard offers a convenient shortcut. Merely tap on the ‘?123’ button located at the bottom-left of the keyboard, and without lifting your finger, hover over the desired special character. Note that hovering over certain characters may reveal additional options. Once satisfied with your selection, lift your finger.
Capitalization Shortcuts in Gboard
Like the preceding two shortcuts, you can capitalize a single letter using a similar method. Tap the caps key (left of the letter ‘Z’), then drag your finger to the intended letter for capitalization. Once positioned, lift your finger.
4. Using Gboard for Emojis, GIFs, Stickers, and Bitmoji
Emojis make expressing emotions effortless. To leverage this, simply long-press the comma (‘,’) button to open the emoji drawer. From there, navigate tabs to insert emojis, GIFs, or emoticons. With emojis or GIFs, utilize the search bar to find what you need.
In the emoji tab, notice a pen icon beside the search bar. Tap it to draw and search for specific emojis.
If you’re a beta tester of Gboard (Android only) running version 6.5.x, you’ll have two additional tabs – Bitmoji and stickers. Set up a Bitmoji account and install a sticker pack to use these features.
5. Utilize Google Search in Gboard
Gboard, as a Google product, facilitates access to other Google products. The keyboard includes integrated Google Search, simplifying web searches and result sharing. To use, tap the Google ‘G’ logo in the top-left corner of the keyboard, enter your query, and select a result to share.
6. Utilize Gboard’s One-Handed Mode (Android)
If your smartphone boasts a large display, such as the Galaxy Note 8, Gboard’s one-handed mode proves invaluable.
To activate, simply tap the Google ‘G’ icon and choose the one-handed mode. This action shrinks the keyboard and shifts it to one side, allowing easy access with a single hand.
If the default position doesn’t suit you, tap the adjustment icon to relocate it to your preferred spot. Additionally, customize the keyboard size as desired.
7. Personalize Phrase Shortcuts on Gboard (Android)
- To begin, access Gboard settings. Then, select “Dictionary” and subsequently, “Personal dictionary”.
- You’ll find a list of enabled language dictionaries. Choose your preferred language and tap the plus icon (‘+’) at the top-right.
- On the ensuing screen, fill in the phrase you wish to add in the first field, and provide a shortcut in the second. Afterward, your changes will be automatically saved upon returning.
Now when you type the shortcut in any app, Gboard will suggest your custom phrase.
8. Type Fractions in Gboard (Android only)
Not all keyboards allow typing fractions and Gboard is no exception. To insert fractions, tap the ‘?123’ icon and long-press any number. Each number will display different fractions, so you may find the one you need after some trial and error.
9. Use Dial Pad in Gboard (Android only)
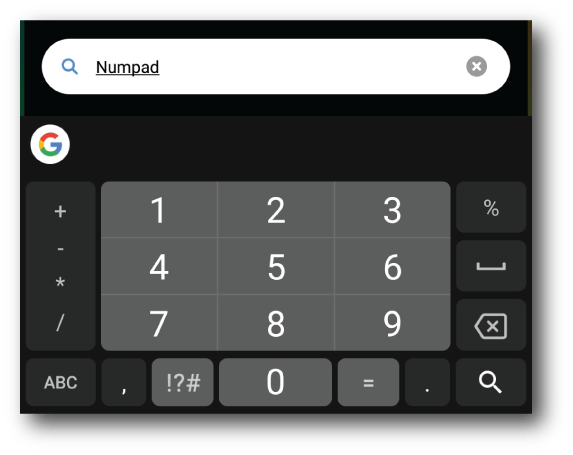
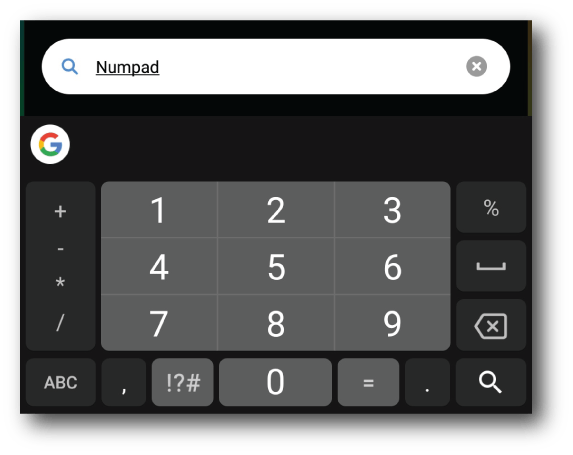
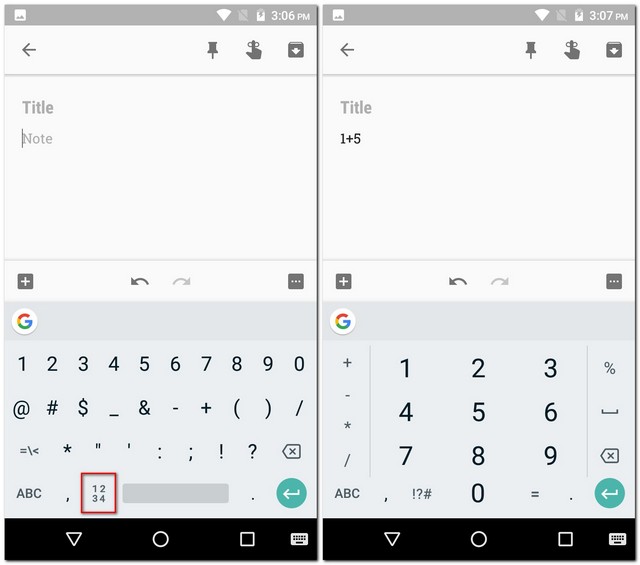
If you need to type numbers frequently, Gboard has a trick for you. The app enables typing numbers as on a dial pad.
To initiate, tap on the ‘?123’ icon, then the ‘1234’ icon (left of the spacebar). Now, numbers will appear as on a dial pad, alongside basic operations like addition, subtraction, and percentages.
10. Voice Typing with Gboard
If typing feels arduous, Gboard offers voice dictation. Leveraging Google Text-to-Speech, it supports 119 languages. To activate, tap the mic icon at the top-right of Gboard and speak.
Note: On iOS, long-press the spacebar to access this feature.
11. Gboard Themes
- Go to Gboard settings. Tap on “Theme”. You’ll see a list of themes, including solid colors and landscapes. Choose an image from your gallery by tapping on “My themes”.
- Tap on different themes to preview how they’ll look. You can add key borders if you prefer. When you’re satisfied, tap “Apply” to confirm.
12. Customize Gboard
Applying themes isn’t the sole customization option Gboard offers. In its settings, you’ll find various options: changing the emoji switch key position, displaying emojis in the suggestions strip, toggling key press sound and vibration, adjusting key press delay, text correction, glide typing, and more. These settings are easily toggled with a few taps. For instance, to enable the number row, navigate to “Preferences” in Gboard settings and activate “Number row.”
Note: Options may differ between Android and iOS versions.
Discover the Best Gboard Tips and Tricks
With these cool Gboard tips and tricks, you’re one step closer to mastering your Android smartphone or iPhone/iPad keyboard. While there are many more tricks out there, these are some of the coolest. Do you have any other favorite Gboard tricks? Share them in the comments below!

Pritam Chopra is a seasoned IT professional and a passionate blogger hailing from the dynamic realm of technology. With an insatiable curiosity for all things tech-related, Pritam has dedicated himself to exploring and unraveling the intricacies of the digital world.

