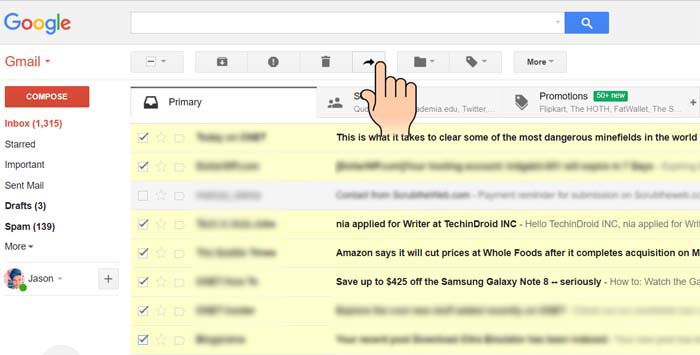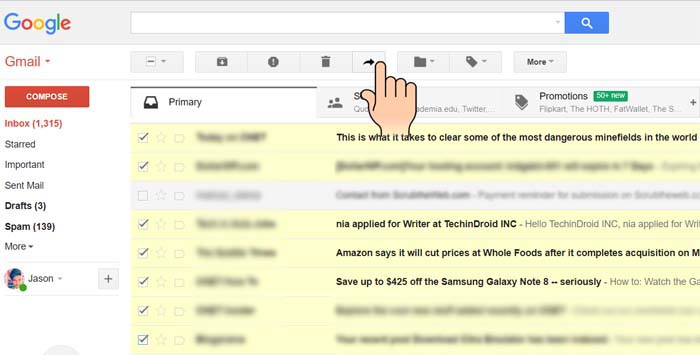
Gmail stands out as the premier email service, boasting user-friendly interfaces and innovative features. Yet, a notable drawback is its inability to forward multiple emails simultaneously, a limitation users often encounter when managing their inbox. However, this inconvenience can be overcome with the aid of Chrome extensions:
Utilizing Chrome Extensions for Multi-Email Forwarding
A practical solution lies in leveraging the Chrome extension “Multi Forward for Gmail.” Follow these straightforward steps:
1. Install the extension from the Chrome Web Store. Upon installation, navigate to Gmail and sign in to your account.
2. Select multiple emails from your inbox and click the Multi Forward icon among other options.
4. The Multi Forward Chrome extension will then prompt you to authenticate your Google Account. Simply click “Sign In“.
5. You’ll need to log into your Google account again and click “Allow” on the permissions page.
6. Once completed, a message confirming “Authentication succeeded“ will appear.
7. Next, select the multiple emails you wish to forward and click the Multi Forward icon. Then, enter recipients’ email addresses. You can add multiple recipients, which is convenient. After entering the email addresses, click “Multi Forward”.
8. The emails will then be forwarded. Simple, right? The process might take a few seconds, so do not close the window.
While the Chrome extension gets the job done, it limits forwards to 100 emails a day, a restriction imposed by Google. Additionally, it does not work on Chromebooks and Google Apps accounts.
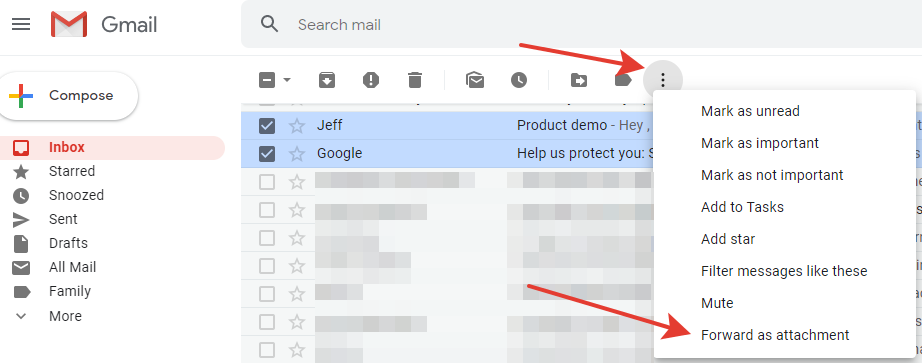
Automatically Forward Emails via Filters
If you prefer not to grant a third-party extension access to your Gmail account, you can use a native method in Gmail to automatically forward emails via filters. Here’s how:
1. First, log in to your Gmail account and navigate to Gmail Settings. In the Settings page, go to the “Forwarding and POP/IMAP” tab. Here, click on “Add forwarding address“.
2. Enter the email address for forwarding. A verification code will be sent to it.
3. Enter the verification code and click “Verify”.
4. Enable “Forward a copy…” and click “create a filter”.
5. Create a filter for automatic forwarding. Specify email addresses, words, attachments, and sizes for filtering. Click “create filter with this search” when finished.
6. On the next page, enable the “Forward it to” option and select the email address you want. Then, click “Create Filter“.
That’s it! You’ll see a forwarding notice at the top of your Gmail inbox for 7 days to ensure awareness.
Forward Multiple Emails in Gmail
If you want to forward only a few emails, use the Multi Forward extension. If you prefer automation, set up forwarding and filters in Gmail. Both methods work well. Let us know of any issues in the comments.

Pritam Chopra is a seasoned IT professional and a passionate blogger hailing from the dynamic realm of technology. With an insatiable curiosity for all things tech-related, Pritam has dedicated himself to exploring and unraveling the intricacies of the digital world.

