Unified Payment Interface (UPI) stands as an innovative initiative by the National Payment Corporation of India, introducing a swift and secure payment method. Launched with the vision of fostering a cashless economy, UPI’s rapid adoption by merchants and service providers signals a diminishing reliance on cash transactions. Recently, Uber integrated UPI into its app, marking a significant step towards enhancing payment convenience for riders across India. Collaborating with NPCI, along with Axis and HDFC banks, Uber ensures a seamless payment experience. This article explores the advantages of leveraging UPI for Uber transactions and provides a step-by-step guide to setting up UPI payments:
Note: Currently, Uber’s UPI integration is available only for Android Users. The iOS update is said to be coming soon, with the process expected to remain the same for iPhone and iPad users upon release.
Setting up UPI With Uber
Setting up UPI with your Uber account can vary depending on whether you already have a UPI account. If you do, it’ll take only a few steps. Otherwise, you’ll need to set up a UPI ID, which you can conveniently do within the Uber app. Let’s begin the setup process without delay.
Use Existing UPI ID in Uber
1. Start with the easier method. If you already have a UPI ID, open the Uber app and tap the hamburger menu on the top left. From there, select “Payments”.
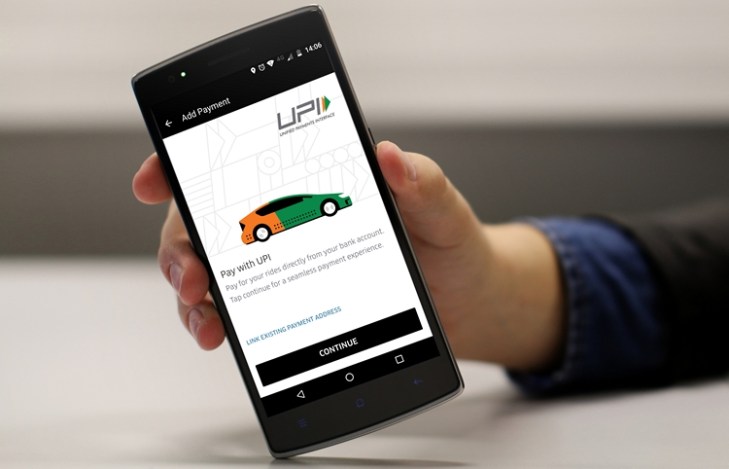
2. Next, select “Add Payment Method” and choose UPI.
3. If you already have a UPI ID, select “Link Existing Payment Address”. Then, enter your UPI ID and tap ‘Save’. Uber will charge INR 1 to confirm your ID, after which it will be added to your payment options.
Create UPI ID in Uber
1. Without a UPI ID, create one inside Uber now. On step-3, instead of selecting “Link Existing Payment Address,” click Continue, then hit ‘Register’ on the following page.
2. The app will prompt you to choose your bank-registered number. If your smartphone has one sim card, ensure it matches your bank-registered number. For dual-SIM devices, choose the number linked to your bank. For instance, I picked ‘SIM 2,’ linked to my bank. Then, simply tap your bank’s name on the next page.
3. Tap your bank name to reveal your bank account in a pop-up card. Then, simply enter the required information and submit.
4. Verify your phone number and create a four-digit PIN. This PIN will authorize all your UPI payments, similar to your ATM PIN.
5. If you’ve followed the steps correctly, you’ve now created your unique UPI ID, also known as your “Payment Address”. Make sure to note it down.
6. Having created the UPI ID, proceed to add UPI as a payment method in Uber. Navigate to Payment->Add Payment Method->UPI. Instead of selecting ‘Continue’, opt for “Link Existing Payment Address”. Input the UPI ID (Payment Address) created earlier and save.
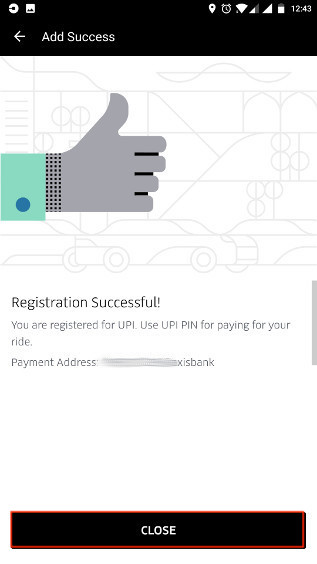
7. As previously mentioned, Uber will charge a token amount of INR 1 to verify the payment address entered. Simply click Continue and then Close. Any concerns regarding the token amount? It will be refunded after authentication.

Approving UPI Transactions in Uber
Now, where do I approve this transaction? Here’s how. The charge from Uber appears in your UPI app. If you created your UPI ID outside Uber or already had one, the charge appears in the app where you created your ID.
Since we created the UPI ID with Uber and Uber uses Axis Bank as the provider, you’ll need to install Axis Bank’s UPI app.
- Uber’s UPI payment is powered by Axis Bank, so we’ll install the “BHIM Axis Pay UPI App”. Click the links to install the app and then launch it (Android / iOS). Once launched, select the phone number used to set up our UPI ID.
2. Enter your name, email ID, and set a 6-digit passcode. Remember, the passcode differs from the PIN previously created. The Passcode grants app access, while the PIN authorizes transactions, introducing 2-factor authentication security. Now, tap ‘Get Started’.
3. On the app’s home page, a pending request from Uber is visible. Tap it. On the next page, an infographic displays transaction parties. Simply tap ‘Approve’.
4. Enter the PIN to authenticate the payment. Enter the 4-digit PIN we created. Now, the payment is approved, UPI is added as a payment method in your Uber account. To confirm, go to the ‘Payment’ option in the Uber app.
Benefits of UPI in Uber
UPI vs Cash
UPI vs Credit/Debit Cards
When using cards for payment, each ride requires inputting your CVV number and waiting for the OTP, which can be frustrating when using Uber frequently. With UPI, this hassle is eliminated. Uber sends a payment request to your UPI ID at the end of your trip, and paying is as simple as launching your UPI app and entering the PIN.
UPI vs Paytm
Paytm offers similar benefits, with a simpler payment process where money is automatically deducted from your Paytm wallet. However, UPI stands out because it charges money directly from your bank account without requiring you to maintain a minimum balance or recharge a digital wallet. Additionally, funds in your bank account are more versatile compared to those in a Paytm wallet, as they can be used for various transactions such as cash withdrawals and transfers.
Considering the above reasons, it is suffice to say that using UPI is superior to any other payment method in the Uber app.
Pay for Uber Rides with UPI
In this article, I’ve explained the setup process of the UPI payment system in the Uber app. If you have any doubts, feel free to ask in the comments. Now that you understand the benefits of UPI, are you inclined to use it over other options? Share your thoughts. We’d love to hear your opinion.

Pritam Chopra is a seasoned IT professional and a passionate blogger hailing from the dynamic realm of technology. With an insatiable curiosity for all things tech-related, Pritam has dedicated himself to exploring and unraveling the intricacies of the digital world.


