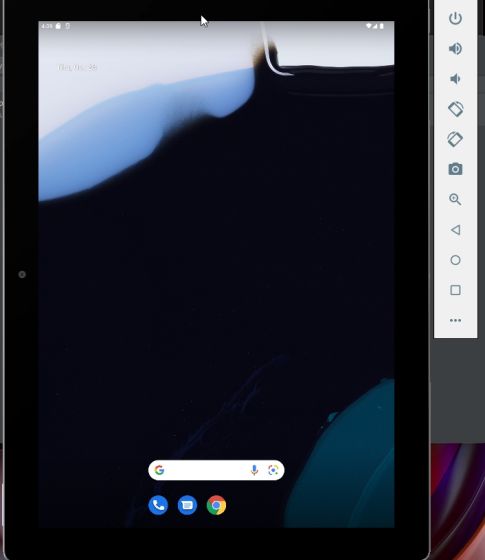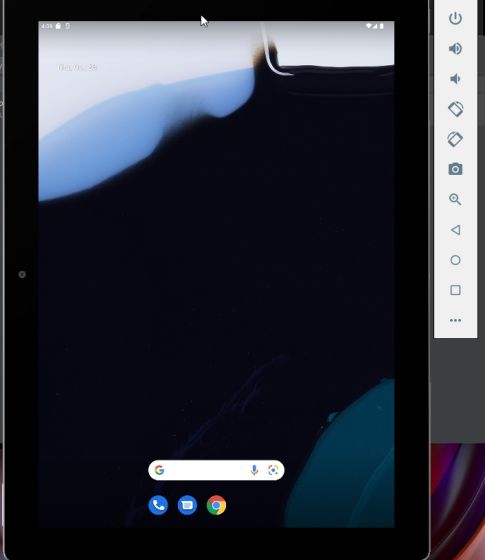
Google announced Android 12L, an OS upgrade for tablets, foldables, and Chromebooks. After years of neglecting the tablet form-factor, Google is now embracing it, spurred by the success of foldables. With the Android Studio emulator, you can experience Android 12L on a Windows PC, Mac, or Chromebook immediately. While performance may not be optimal, you can preview how Android 12 operates on a larger screen. If you’re intrigued, follow our guide to install and utilize Android 12L on your PC, Mac, and Chromebook.
Exploring Android 12L on Windows, Mac, and Chromebook (2021)
This article provides a step-by-step process for installing and trying out Android 12L on Windows PC, Mac, and Chromebook. Depending on your operating system, you can navigate to the relevant section from the table below.
Install and Use Android 12L on Windows and Mac
To experience Android 12L on Windows 10/11 or Mac, you only need Android Studio. Get the latest Canary version of Android Studio to try the Android 12L emulator. Follow these steps:
1. Download the Canary build of Android Studio. Click here to download. It will offer the setup file automatically based on your OS – ZIP for Windows and DMG for macOS.
2. Upon downloading the file, Windows users must extract the ZIP and navigate to the “bin” folder. Then, double-click “studio64.exe“. Mac users can drag Android Studio to the Applications folder.
3. Now, the Android Studio installer will open. Keep all settings as default and click “Next“. During setup, it will download required packages from the internet.
4. Once installation is complete, click “More Actions” and select “Virtual Device Manager” from the Android Studio window.
5. Click “Create Device” at the top-left.
6. On the next screen, go to the “Tablet” section under “Category” and pick “Pixel C” or “Nexus 9”. Alternatively, select “Foldable” from the “Phone” section.
7. Then, click “Download” next to Sv2. Sv2 is the new Android 12L build for testing, with a file size of around 1.4GB, so please be patient. It should take about 5 minutes with a speedy internet connection. Afterward, click “Finish”.
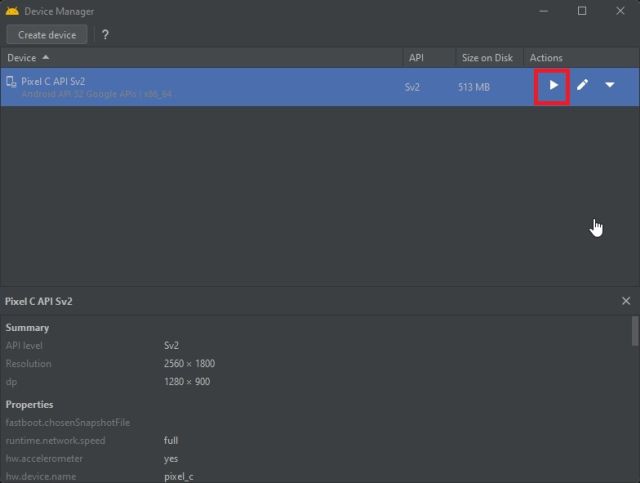
8. Returning to the main Android Studio window, click the “Play” button under “Actions” for the Pixel C or Nexus 9 device created in the previous steps.
9. That’s it. The Android 12L emulator will load on your Windows PC or Mac instantly. Now, you can explore all the new features and UI changes in Android 12L effortlessly.
Install and Run Android 12L on Chromebook
To run Android 12L on a Chromebook, your device must meet specific criteria. Below are the requirements and steps in clear detail. Follow these instructions precisely to enable Android 12L on your Chromebook.
Requirements for Android 12L
1. You need a powerful Chromebook, preferably with an Intel or AMD processor. Chrome OS devices powered by ARM-based Mediatek or Snapdragon processors cannot run Android 12L at present. However, Google may introduce support for these processors in the future.
2. Linux support is essential for your Chromebook. Thus, many school-issued Chromebooks may not support Android 12L yet. Google recently permitted Linux usage on school Chromebooks, pending approval from the school administrator.
3. Nested KVM support is required to use the Android 12L emulator on your Chromebook.
Setting Up Linux on Your Chromebook
1. Begin by setting up Linux on your Chromebook using our detailed guide. Allocate over 20GB of disk space to Linux.
2. After installing Linux, open the Terminal and run the following command to ensure everything stays updated.
sudo apt-get update && sudo apt-get upgrade -y
3. If you encounter errors like “not available” or “can’t connect”, run the following command. It will switch the Buster repository to oldstable. This addresses one of the persistent issues with Linux on Chromebook. After running this command, execute the update command again, and this time, it should work smoothly.
sudo apt-get update --allow-releaseinfo-change
4. Now, proceed to install the Java Development Kit (JDK) on Linux for your Chromebook. Execute the following command in the Terminal:
sudo apt -y install default-jdk libnss3
Install Android 12L on Chromebook
1. Then, download the Canary build of Android Studio from this link. It will be in DEB file format.
2. Afterward, open the Files app and transfer the DEB file to the Linux section.
3. Now, open the DEB file and promptly install it. Note that installation may require some time, so please be patient.
4. Once installed, launch Android Studio from the menu located in the “Linux” folder.
5. Proceed through the on-screen setup instructions, opting for default settings. Click “Next” and complete the setup, during which the installer will download necessary packages from the internet.
6. After installation, refer to the instructions in the Windows/Mac section above, starting from step #4. Subsequently, the steps for Windows, Mac, and Chromebooks are identical.
Once Android 12L is installed on your device, explore these new UI and multitasking features:
- Homescreen
- Quick settings and notification panel
- Multitasking
- App switcher
- Settings app and taskbar
Discover New Features in Android 12L
Here’s how to set up Android Studio and run Android 12L on your Windows PC, Mac, or Chromebook. Currently, Android Studio offers this tablet and foldable-friendly version of Android 12 via the emulator. Soon, we’ll experiment with installing the OS on a tablet. That concludes our guide. For the top Android 12 features, visit our linked article. Moreover, if you’re using an older Android version, you can already access Android 12 widgets on your phone. Any questions? Feel free to ask in the comments below.

Pritam Chopra is a seasoned IT professional and a passionate blogger hailing from the dynamic realm of technology. With an insatiable curiosity for all things tech-related, Pritam has dedicated himself to exploring and unraveling the intricacies of the digital world.

