In Minecraft, customization is key, particularly on PvP and multiplayer servers, where standing out matters. Character skins offer a prime opportunity for personalization. The internet boasts an extensive array of downloadable Minecraft skins, allowing you to tailor your experience precisely. Below, we outline the streamlined process for acquiring and installing these skins in Minecraft, ensuring you have a multitude of options at your disposal. Our focus will solely be on skin packs for the player character.
Step 1: Obtain a Minecraft Skin
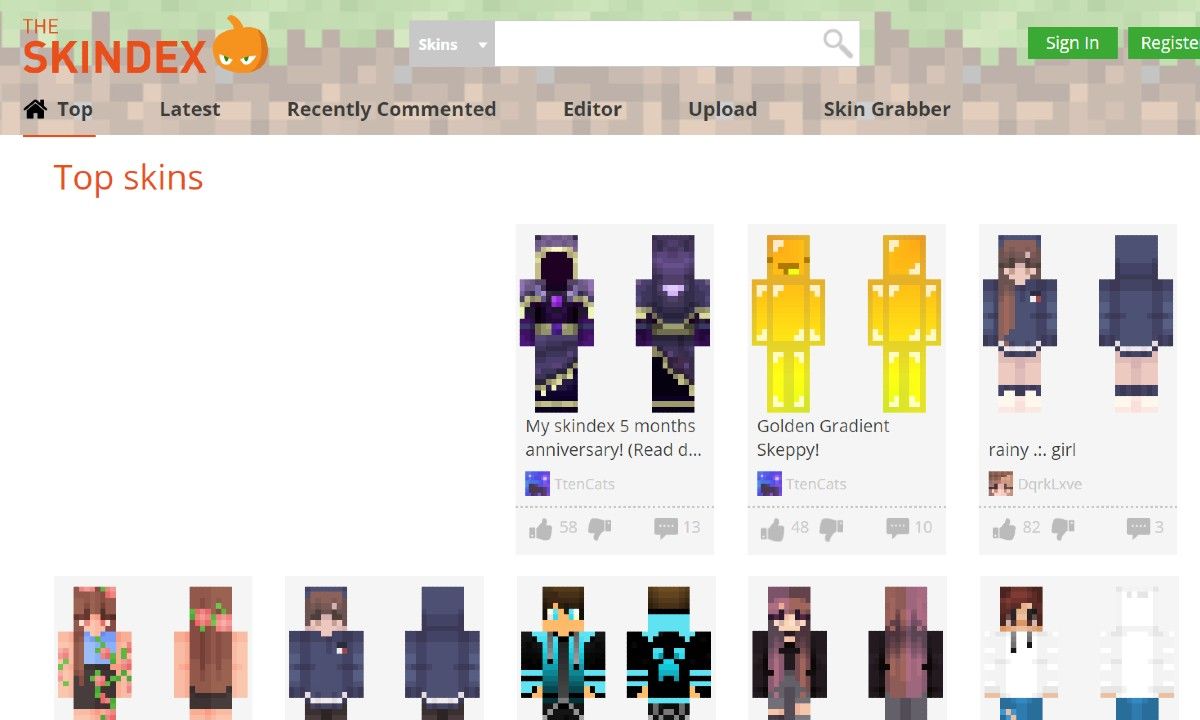
- To begin, visit the Minecraft Skindex homepage and select a skin. You can utilize the search option to find a specific character or theme, or explore our curated lists of the coolest Minecraft skins and best Minecraft girl skins.
- Once you’ve chosen a skin, navigate to the export options page. Click the “Download” button located in the right menu.
- A PNG file will be downloaded to your computer, accessible in your Downloads folder. Please note, the quality may be lower.
Install Minecraft Skin on Bedrock Edition
- Open Minecraft for Windows. On the main menu, you’ll find your current character and a Dressing Room button. Click the button.
- On the character selection screen, choose the character you want and click the gray character. Click Create Character.
- A pop-up screen will appear. Select the bottom option for the Classic Skin and click Create Classic Skin. Then, click OK on the next screen.
- In the Owned Skins tab, click the gray skin. Below the skin preview, click Choose New Skin.
Minecraft Skin Installation Guide
- Browse your device files to locate the downloaded skin in the Downloads folder.
- Choose your skin and select either slim or classic model by clicking it. The only difference lies in the arm width.
- Exit the Dressing Room and click Play from the main menu to start the game with your chosen skin.
Installing Minecraft Skin on Java Edition
- For Java edition, visit the official Minecraft website and log in by clicking the “Log in” button at the top right corner. Sign in using your account credentials.
- Under Minecraft: Java Edition, find the Change Skin button and click it.
- To start, choose your preferred model: classic for Steve or slim for Alex.
- Next, navigate to the Upload Custom Skin section and select the File.
- Browse your device files, then pick the PNG file you downloaded.
- Click Upload to apply the skin to your character.
- Once finished, close the website and launch Minecraft Java from the Launcher to access the game. Your new skin will be automatically applied.
Changing Your Skin with Minecraft Launcher
If you’re running Minecraft Java edition offline, the website method may not work. You can alternatively download and install skins using the default Minecraft launcher.
- Download a skin and open the Minecraft Launcher by double-clicking its icon on your desktop or in the game directory. Alternatively, use the Windows key to search for it.
- In the launcher, head to the “Skins” tab. Click the “+” sign to choose the “New skin” option.
- Select the skin model and the skin file. You can also name the skin at the top. Click “Browse” to find your downloaded PNG skin file. Once selected, click “Save & Use” to apply it.

Installing Skins in Minecraft Pocket Edition (MCPE) on Android and iOS
Fortunately, thanks to the connected Bedrock environment, changing or adding skins in Minecraft PE for Android, Windows 10, iOS, and Fire OS follows the same process as installing skins on the Bedrock edition.
Utilize the Bedrock Edition tutorial earlier in this article to install new skins in the Pocket Edition of Minecraft. The main difference you’ll notice is that instead of the “Dressing Room” button on the home screen, you’ll find a clothes hanger icon.
Simply click on this icon and begin following the same process as the Bedrock edition to change your Minecraft skin.
Creating Your Own Custom Minecraft Skin
To edit and customize your Minecraft skins, you have two options. Firstly, utilize the default skin as a template and modify it using photo editing software like Photoshop. This method offers greater customization flexibility, enabling you to overlay images onto the skin. Ensure to save the edited version as a transparent PNG with matching resolution and dimensions.
Alternatively, if you prefer a simpler customization approach, utilize the online Minecraft Skin Editor available on Skindex, the same platform used for downloading skins. Here’s how:
- Access the MinecraftSkins Skin Editor either through the provided link or by clicking the “Edit Skin” button displayed alongside any skin you’re viewing on Skindex. You can also find the “Editor” option in the site’s top menu bar.
- Now, you will be taken to the Skin Editor, where you can use a simple brush and coloring tool to fill the boxes and create a Minecraft Skin. The editor resembles the basic version of MS Paint.
- Once editing the skin is complete, select the Model as Classic or Slim and click “Download”. Apply it to your character as any other downloaded skin. Alternatively, upload your skin to Skindex by clicking “Upload to Skindex”. This allows you to share your creation with other Minecraft players on the website.
- Load your self-made skin in the game and edit it later on Skindex or classic photo editors.
- For more information on making your own Minecraft skin, refer to our detailed guide published and linked here.

Pritam Chopra is a seasoned IT professional and a passionate blogger hailing from the dynamic realm of technology. With an insatiable curiosity for all things tech-related, Pritam has dedicated himself to exploring and unraveling the intricacies of the digital world.


