Time flies when you’re working or gaming on your PC, sometimes disrupting your schedule. To maintain discipline, schedule your work or gaming hours. Set up your Windows 10 PC to automatically shutdown after a period or at a specific time daily. Here’s how:
Method 1: Schedule auto shutdown with Task Scheduler
Use Windows’ Task Scheduler to create a task for automatic shutdown. Follow these steps:
1. Access Windows 10’s Cortana search and look for “Task Scheduler”. Click on the relevant result.
2. The Task Scheduler window will open. Click “Create Basic Task…”.
3. Set a name and add a description for the task. Then, click “Next”.
4. Choose the task’s frequency: daily, weekly, monthly, or one-time. Select when to trigger the task: upon login, computer startup, or upon a specific event.
5. Once finished, select the exact start time for the task. You can also enable “Synchronize across different time zones” if you frequently travel.
6. After choosing the task’s start time, select the action you want it to perform. Opt for “Start a program” or “Display a message” for a simple reminder.
7. Click the “Browse” button on the following page and navigate to C:\Windows\System32. Choose “Shutdown.exe”. In the add arguments, enter “-s -t 1800” (where 1800 signifies the number of seconds until shutdown). Click “Next” when finished.

8. Review the task overview and select “Finish” to complete the process.
After creating this task, you’ll receive a notification at the scheduled time, indicating that your Windows 10 PC will shut down automatically after the specified duration. We suggest setting the number of seconds in the 7th step to allow time for saving ongoing tasks.
Once created, navigate to Task Scheduler -> Task Scheduler Library. Right-click on the task and choose “Properties“. Here, adjust security options, conditions, history, and more. You can also run, end, delete, or disable the task from the right-click menu.
Method 2: Auto Shutdown via Run or Command Prompt
Run
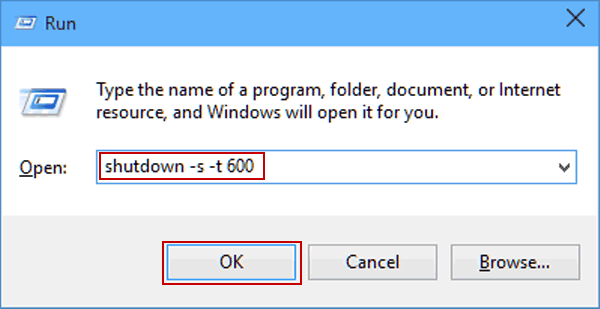
Open Run on Windows 10 with the key combo Win+R. In Run, type “shutdown -s -t 1800“, with 1800 (30 minutes) being the time after which the PC will shut down. Click on “Ok”, after which you will receive a notification saying “Windows will shut down in 30 minutes”.
Command Prompt
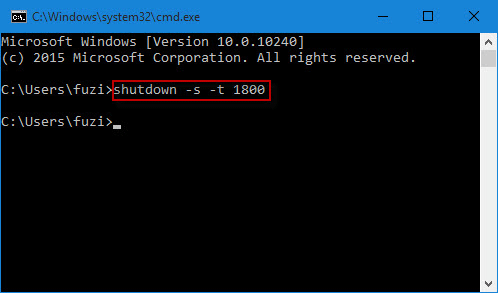
You can open Command Prompt or Powershell and run the same command “shutdown -s -t 1800” to auto shutdown Windows 10 PC.
Note : You can replace “-s” with “-r” in all the shutdown commands to auto restart your Windows 10 PC.
Ready to automatically shutdown your Windows 10 PC?
If you want to schedule shutdown your Windows 10 PC temporarily, use the second method. However, for a long-term auto shutdown solution, opt for the first method, which offers more options. Try both methods and choose what suits you. Let us know if you face any issues in the comments below.

Pritam Chopra is a seasoned IT professional and a passionate blogger hailing from the dynamic realm of technology. With an insatiable curiosity for all things tech-related, Pritam has dedicated himself to exploring and unraveling the intricacies of the digital world.


