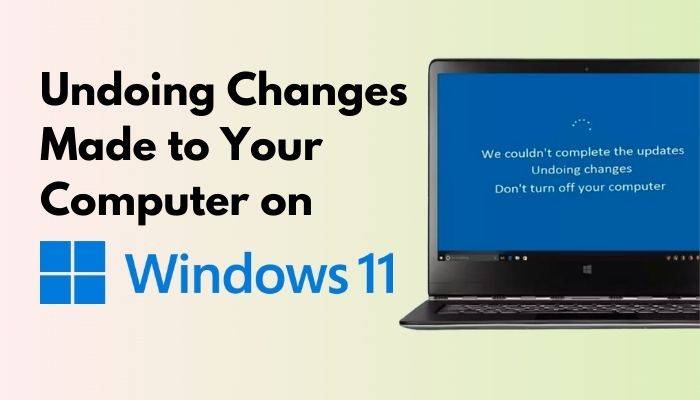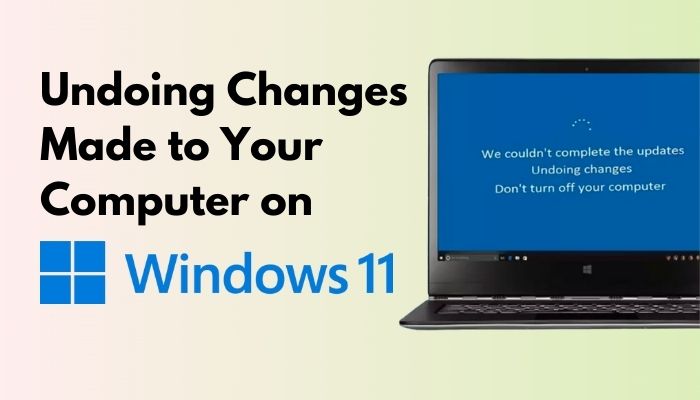
Windows 11 is a great operating system, and Rectify 11 (Redesigned Windows 11) improves upon it with a consistent UI and upgraded features. However, like Windows 10, update issues in Windows 11 can be annoying. Occasionally, Windows 11 will display an “Undoing changes made to your computer” error during an update. Despite repeated attempts to download, the update fails to install. To assist you, we’ve compiled 10 methods to resolve the “Undoing changes made to your computer” error in Windows 11. If you’re stuck on this screen or encountering errors like 0x800f0922 or 0x800f0988 on your Windows 11 PC, we have the solution. Let’s dive in without delay.
Resolving ‘Undoing Changes Made to Your Computer’ Error in Windows 11 (2022)
This tutorial offers 10 methods to resolve the “Undoing changes made to your computer” error on Windows 11. If you encounter this error while updating or applying a new update, the following methods can assist in resolving the issue. You can navigate to any section using the table below.
1. Resolving Stuck “Undoing Changes Made to Your Computer” Error
If your Windows 11 PC remains stuck at the “Undoing changes made to your computer” error for an extended period, you can resolve it from the recovery menu. Follow these steps:
1. If your computer is stuck at the “Undoing changes made to your computer” error, I suggest waiting for a few hours. If there is no progress even after 2-3 hours, press and hold the power key to shut down your PC.
2. Now, press the power key once and the “F8” key. It will open the Recovery screen. If that does not happen, try pressing “Shift + F8” simultaneously. On other computers, pressing the “Esc” or “F11” key may trigger the Recovery menu.
3. Once on the Recovery screen, click “Troubleshoot”.
4. Next, click Advanced Options and choose “Startup Repair”. Now, your Windows 11 PC will restart and diagnose. After that, your PC should boot fine.
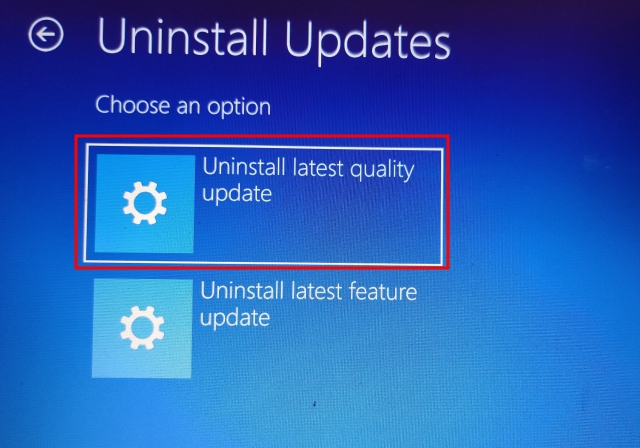
5. If the above step didn’t work, click on “Uninstall Updates” under “Advanced options” on the Recovery screen.
7. After that, click on “Uninstall latest quality update“. Now, restart your Windows 11 PC, and the “Undoing changes made to your computer” error should be eliminated.
2. Getting Error 0x800f0922 or 0x800f0988 While Updating Windows 11
If you are encountering the “Undoing Changes Made to Your Computer” error, along with either the 0x800f0922 or 0x800f0988 code, you can resolve it with a simple service adjustment. Here are the steps:
1. Once logged into your PC, press the Windows 11 shortcut “Windows + R” and open services.msc. Then, hit Enter to access the Windows Services window.
2. Look for “App Readiness” and open it. Change the Startup type to “Automatic” and start the service. Click “OK.”
3. Update your Windows 11 PC. You should not see “Undoing changes made to your computer” or “0x800f0922” errors.
4. If you’re specifically getting the “0x800f0988” error, try running the following command. Press the Windows key once and search for “cmd“. Click “Run as Administrator.”
5. Execute the command below. It will clean up the WinSxS folder. Once done, update your Windows 11 PC, and it should work fine.
dism /online /cleanup-image /startcomponentcleanup
3. Resolve “Undoing Changes Made to Your Computer” Error Using Command Prompt
If your Windows 11 PC fails to update to the latest build and displays the “Undoing changes made to your computer” error, try these Command Prompt commands.
1. Press the Windows key, search for “cmd”, and select “Run as Administrator”.
2. Enter the following commands sequentially to halt essential Windows Update services:
net stop wuauserv
net stop cryptSvc
net stop bits
net stop msiserver
3. Then, use these commands to rename the update folders:
Ren C:\Windows\SoftwareDistribution SoftwareDistribution.old
Ren C:\Windows\System32\catroot2 Catroot2.old
4. To restart the services, run these commands:
net start wuauserv
net start cryptSvc
net start bits
net start msiserver
4. Run Windows Update Troubleshooter
If none of the above methods have worked, try the official Windows Update troubleshooter. It has fixed many update-related bugs in the past for me. Follow these steps:
1. Press the Windows key and search for “Troubleshoot“, then open it.
2. Click on “Other troubleshooters“.
3. Click “Run” next to Windows Update.
4. Follow the on-screen instructions to complete the process. Then, restart your PC and try updating to Windows 11 again.
5. Upgrade to Windows 11 Using Installation Assistant
If you’re encountering the “Undoing changes made to your computer” error when upgrading from Windows 10 to Windows 11, follow these steps to avoid it. With the Windows 11 Installation Assistant, you can upgrade seamlessly.
1. Download the Windows 11 Installation Assistant.
2. Run it and follow the on-screen instructions.
3. Download the latest Windows 11 build, then restart your computer to upgrade.

6. Apply Windows 11 Update Manually
To bypass the “Undoing changes made to your computer” error on Windows 11 for smaller updates, manually download and apply the update with these steps:
1. Press “Windows + I” to open Settings, then navigate to “Windows Update”.
2. Note the update pack starting with “KB”. Visit catalog.update.microsoft.com, enter the noted update pack, and press Enter.
3. It displays all available updates for the update pack. Based on your system, whether it’s x64 or ARM-based, download the required update. For most users, it’s x64.
4. After downloading the update, double-click to install it. Once done, restart your computer to have your Windows 11 PC updated to the latest patch. Easy, isn’t it?
7. Explore Windows 11 Update Errors with Event Viewer
Sometimes, Windows 11 shows the “Undoing changes made to your computer” error without displaying an error code, hindering our ability to pinpoint the exact issue. To address this, we’ll utilize the built-in Event Viewer, which logs background operations. From there, we can identify the root cause of the error on your Windows 11 PC. Here’s how:
1. Press the Windows key and search for “Event Viewer”, then open it.
2. Navigate to Windows Logs -> Setup.
3. Under “Setup”, review all update logs to locate the error code in the bottom pane. For example, mine is 0x800f0922.
4. Pin down the issue. Search the error code on the internet to find a solution.
5. Additionally, download SetupDiag (click here) to determine the reason behind the unsuccessful update. Run the EXE file, and the log (logs.zip) will be generated in the same folder.
8. Execute DISM, SFC, and CHKDSK Commands
If you’re still encountering the “Undoing changes made to your computer” error, run the DISM and SFC commands to resolve update issues on your Windows 11 system. Follow these steps:
1. Press the Windows key and search for “cmd”. Click on “Run as Administrator”.
2. In the CMD window, execute the DISM command below to fix image corruption issues.
3. After that, execute the SFC command to verify file integrity.
SFC /scannow
4. Finally, execute the CHKDSK command to repair any bad sectors on the hard disk. Type “Y” when prompted and press Enter. Restart your computer; the hard disk will be checked for errors during boot.
chkdsk /f
9. Windows 11 Drivers Update
Many report that outdated drivers can prevent Windows 11 updates. If this applies to you, update all your drivers to the latest version compatible with Windows 11. Refer to our guide for detailed instructions on updating drivers. Here’s a brief overview:
1. Start by using the “Windows + X” shortcut to open the Quick Links menu. From there, choose “Device Manager”.
2. Within the Device Manager window, select the driver you wish to update. For instance, to update the graphics driver, expand the Display adapters menu, and right-click on an entry. One represents the integrated GPU, while another is a discrete GPU from AMD (if present). Then, select “Update driver”.
3. In the ensuing pop-up window, click “Search automatically for drivers,” and Windows 11 will scan Microsoft’s extensive online catalog for the relevant driver.
4. If an update is available, it will install the latest driver and prompt you to restart the PC. Otherwise, it will notify you that the best driver is already installed on your Windows 11 PC. Repeat this process for all connected hardware devices, then attempt to update your Windows 11 computer.
10. Boot Into Safe Mode
Finally, if you’re stuck in a boot loop with the “Undoing changes made to your computer” error on the screen, boot into safe mode and roll back the updates. Follow our guide on starting Windows 11 in safe mode and making changes from the isolated environment. Here are the steps to follow.
1. If stuck on the “Undoing changes made to your computer” screen, power off your PC. Turn it back on, then off again. Repeat this 3-4 times, triggering the Recovery menu.
2. Once there, navigate to Troubleshoot -> Advanced options.
3. Move to the “Startup Settings” page and click “Restart”.
4. Now, press “4” or “F4” on the keyboard for Safe mode.
5. Within seconds, boot to Windows 11 Safe mode.
6. Press the Windows key, search for “Control Panel“, and open it.
7. Go to Programs -> View installed updates.
8. Click the latest Windows 11 update and “Uninstall” it. Restart your computer to boot back into Windows 11 without errors.
Resolve Windows 11 Update Issues
Here are 10 ways to resolve Windows 11 update issues. If none work, check the log with Event Viewer to identify the underlying problem. If you’ve forgotten your Windows 11 password and need to reset it, follow our tutorial here. To fix Microsoft Store issues on Windows 11, refer to our guide. For any questions, leave them in the comments below.

Pritam Chopra is a seasoned IT professional and a passionate blogger hailing from the dynamic realm of technology. With an insatiable curiosity for all things tech-related, Pritam has dedicated himself to exploring and unraveling the intricacies of the digital world.


